Sunday, 20 January 2013

Finally, another post.
Long time, I hear you, assuming anyone still reads this, my apologies, but it was always going to be erratic, career changes are time consuming, but apologies nevertheless.

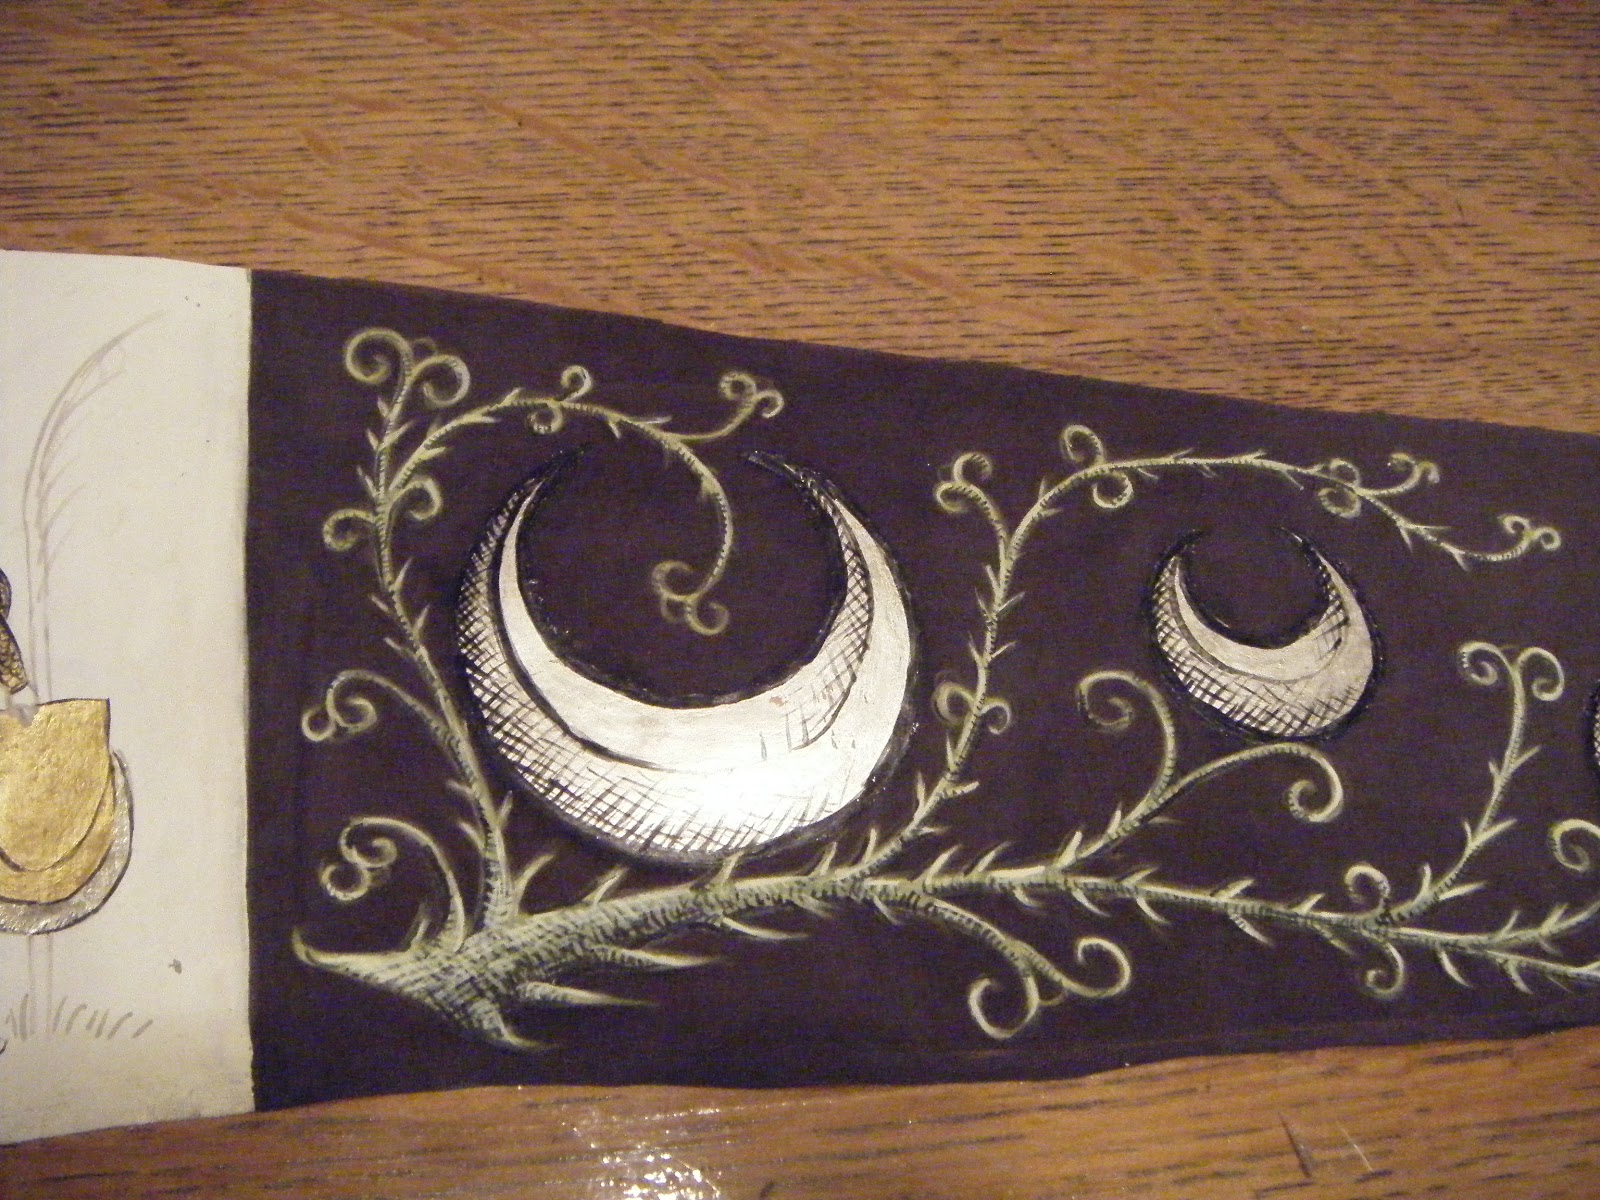
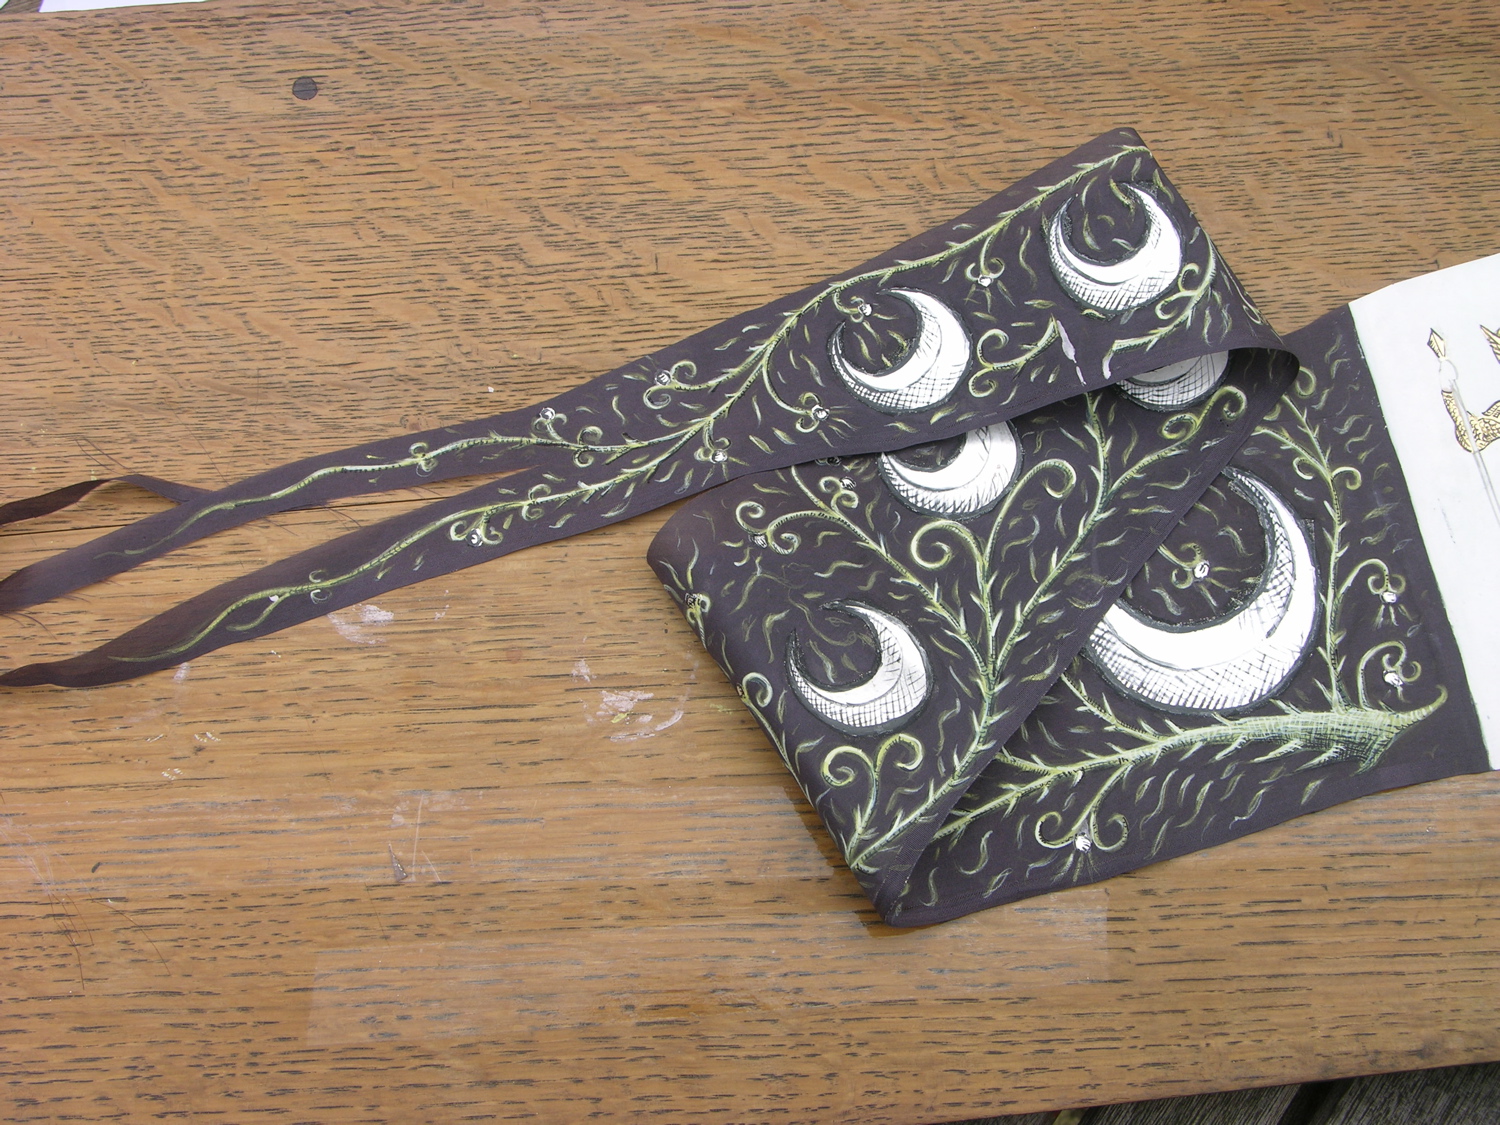
A year or so ago I was asked by a museum curator to design and make a helmet pincel, or long thin triangular flag.  He wanted to honour his brothers at arms in his 15th century jousting group. The client is well versed in medieval military matters and has high standards in his own armour and training and the project process was treated as any other design project. Initial meetings to establish requirements, preliminary sketches and ideas, project commencement and completion.

This has been my most complex project to date, in that the flag is made of many elements, each had to be agreed with the client and allowing for the inevitable corrections and amendments. It is also one of the most rewarding as I had to focus and immerse myself in the project.

Sadly I lost many of the final piece photos, but here are some late work in progress shots, poor quality, but they give you an idea, once I get time with the client, I shall take some shots of it in situ, on the helmet.

The composition;
St Mauritius (The Patron Saint of the Order) at the hoist, in gold harness and blue and red clothing.
Six crescents - one large one signifying the Order of the Crescent (the modern version of the medieval order that existed) - five smaller crescents representing four current members and one that has left the order, the latter symbolised by the connecting vine having been severed.

The crescents are unified by a trailing rose vine, spines along the base, offshoots with silver leaf 'buds' signify possible future members and growth, void areas are filled with green tracery, to fill space but to also join the elements, I judged there to be too much black space between the elements, it is also in keeping with such pattern seen in medieval images of flags and backgrounds.

The basic specification is as follows:
Silk - lightweight habotai
Oak gall black dye
Silver leaf for the crescents
Gold leaf for St Mauritius' harness.
Pigments: titanium white, yellow ochre, red ochre, lamp black, synthetic vermilion, genuine ultramarine, synthetic indigo, synthetic lead yellow.
Binders - size, gum arabic.
Modern agents - conservation grade clear varnish sealer for paint and silver areas.
Fraystop for the cut edges.

Length - 3 feet, tapering right angled triangle, bifurcated last 9 inches or so.


Sunday, 31 October 2010

Tools of the trade pt 2

Firstly a sorry, a long since my last post. I have been rather distracted with applying for training for a career change, so all the fun stuff has taken a distant second, third and possibly tenth place.

But, here is my next offering, pens and penknives, a brief overview of some of the kit I use for writing.

Pens
No would-be painter should be without his main tool of work, not the brush, but the humble pen. Mainly goose quill, but other feathers could employed, such as buzzard, crow and swan. These are the pens most familiar to us, but other forms of pens did exist; tubular brass/copper alloy, reed (antiquated by the late middle ages) and capillary pens such as this one.

Before a painter can paint, he must be able to draw, or so thought Cennini, the writer of a well-known artist's treatise at the end of the fourteenth century. His opening chapters focus on the acquisition of drawing skills, using not just pens, but charcoal and lead or metal point.

There are a few ways in which pens can be cut, they generally tend to follow the same method, with a few variations.

I tend to use this method, with the exception that to make the slit, I lay the pen down, cut side up as Jenn does, but I rock my curved penknife blade on to the nib to make the slit, I found from personal experience that this results in a very clean cut. As Jenn rightly says, a sharp penknife is what is needed.

As Jenn and I both 'do it medieval' we tend to use the tools they did, more modern methods will invariably use modelling knives.

Some advocate tempering the quill by immersion in hot sand, I have not been shown any clear evidence that the medievals did, however, one manuscript image of a stationer's stall, Italy, shows feather hanging up, presumably to dry. I know that older, drier feathers are harder, I end to gather mine during the summer from local reservoirs when the water fowl are shedding their feathers.

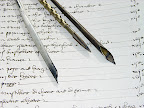
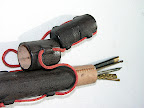
Featured below are a selection of pens and associated tools, all owned and used by me.

From left to right, goose, tubular brass, capillary pen.
The writing on the paper was done with a goose pen.

From Medieval colours


A set of well used pens

From Medieval colours


A pen case with pens and knife.

From Medieval colours


Pen knife

From Medieval colours


Bronze stylus
Used for drawing on prepared paper or for scoring lines in paper or parchment for margins and text lines.

From Medieval colours


Wednesday, 24 March 2010

Tools of the trade part 1. Brushes.

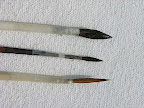
A significant part of the fun of investigating medieval painting techniques is the tools themselves. From my very first forays into this, circa 1991, I have tried to source the proper tools for the job of a would be medieval painter. It has not been easy, some things do not survive in the archaeological record from which to copy despite being well documented in manuscripts and paintings, a prime example is paint brushes. Images of paintbrushes are common enough, the many paintings of St Luke painting the Virgin Mary show brushes amongst other tools. Cennini in his Libro d'ell Arte describes how to make two sorts of brushes, miniver and bristle.

Miniver
Miniver brushes are made by gathering the tip hairs of the miniver tails into small bundles, they are wetted and shaped and leveled off, ie the cut bases of the hair are set at the same level. Each bundles is then add to another, shaped in the same way etc. Once graded they are assembled in bunches suitable for all manner of quills, goose right down to dove. The bundles are tied off with a waxen thread of linen or silk using two knots. The quill is cleaned and cut tubular part of the lower feather, the hollow end, the brush ends are then pushed gently down the quill until it sits snugly and does not fall out. A stick is then set into the other end to form the handle, approximately 9 inches long. 

I tried this method, but my skills were lacking so I sought another solution, I found a traditional brush maker who was happy to supply me with just the brush tips, gathered and tied. I simply set them into the quills I had acquired. I found that if the quills were soaked in water first, they became pliable and made insertion of the finer brushes easier and when the quills dried made for a snugger fit. I added some whittled sticks, using any hardwoods appropriate to England at the time, eg oak, walnut. See top image.


Hog's bristle
These are much simple to make than than the above, the initial process is much the same, the bristles are gathered and leveled, but are tied up in small bundles, a number of bundles are then gathered as required and tied to a tapered stick. He describes making rather large brushes, large enough for whitewashing, or laying down lime on wall, this made the brushes more supple and the abrasion tapered the bristles. When supple enough he took them apart and made them into smaller brushes, tied onto the stick as described above.


Note that the bottom brush is caked in a white substance, this is not a dirty or neglected brush, but one that has  been covered in wet chalk dust to prevent insect damage.

I made mine after sourcing some commercially available Chinese hog bristles, I had had no luck with local pig farmers, of which there are many, the main reason being the pigs were dehaired at the abbatoir. I also made brushes up out of old house paint brushes. 


Sunday, 11 October 2009

Bones and colouring

In certain reenactment circles, mainly those concerned with reproducing artefacts from long ago using as true to era methods and materials as possible, the subject of dyeing bone comes up. Bone was used for a wide variety of tools; lucet,  knife handles (middle), needles, smoothing tools etc, a whole plethora. There are extant recipes for dyeing bone in a variety of ways, the palette may seem a little limited to us today, given the sheer range of chemicals that represent almost any colour that we could wish for. Coloured bone could be used for artefacts such as jewellery, inlay work and things such as knife handles.

The colours include:

Reds
Brazil wood, Caesalpina Sappanensis and C. Echinata, the former is the brasil wood of medieval times, the latter is the New World alternative that was discovered by early Portuguese and Spanish colonists. C. Sappanensis occurs naturally in places such as Southern India and Sri Lanka and had a long history of being exported to Europe as a very bright red dye stuff. The discovery of the C. Echinata meant an alternative source and a reduced monopoly on trade from the East.

Madder, Rubia Tinctora, the root is used, either pulverised or in small pieces, this was a common dyeing plant used across Europe for many hundreds of years. It yields colours ranging from orange tawnies to reds and browns, depending on the location of dying and mordants. There is evidence that madder was also used as a paint for woodblock prints, but its primary use was to dye cloth.

In both red dyes the mordant is alum, this enhances the colouring and binds the colour to the substrate, I used commonly available dyeing recipes, ie an amount of either brazil or madder and an amount of alum, in this case a handful of madder with two tablespoons of alum, brazil a small handful and the same amount of alum, this was rule of thumb given the quantities of bone I was dyeing.

Blacks
For dyeing bone, one recipe uses what is in effect black ink, made from a source of tannin and iron salts, often oak galls and ferrous sulphate, respectively. For my black bone I simply let the bone soak in an ink batch I had lying around.

Greens
One recipe mentions the use of verdigris, or copper acetate for the colouring agent, this chemical is made by exposing copper to acid fumes, the green is then gathered from the surface and is used variously as a pigment, ink and a dye for bone and wood. The bone or wood is laid into a solution of verdigris, then over time this takes on the green colour. At the time of writing this I have a piece of bone lying in a solution, when it it is ready I shall update this entry.


The image shows four goose bones, from left to right; black (oak gall/iron), red (brazilwood), red(madder) and undyed for control. You will note the difference in colour of the two reds, the brazil is a cooler red with a blue register and the madder is a warmer red erring to the orange, also of interest the madder specimen was a deep orange rather than a red when first removed from the solution, but overnight turned more red, I regret not taking a photo of this, next time perhaps.
Close up of end of goose bone in brazil.
Close up of goose bone in madder.
Close up of goose bone in iron gall solution (ink).


Sunday, 13 September 2009

Sun helmet orb.

I recently worked at the Hampton Court Tudor joust on the August Bank Holiday, 29-31, part of the display was to show not just jousting but how some of the more ephemeral items were made.

The image below is of a helmet orb.


The specification is as follows:

Turned hardwood ball
Gesso ground
Bole and gold leaf
Vermillion and lead tin yellow
Binding medium egg yolk.

This item was produced very quickly, as can be seen by the coarseness of the brush strokes up close.

The actual method is the interesting feature IMHO, that using sgraffito, this is the laying on of colour on gold or silver leaf using the egg yolk as the binder. When dry a sharp wooden stylus is used to scrape away the paint revealing the metal leaf underneath. In this case the theme of the joust was a contest between the Knight of the Sun (Henry VIII) and the Knight of the Moon (George Boleyn). The emblems used were suns for the king, in red and crescents for Boleyn, silver on black. With that in mind I reversed the idea, and used the gold as a highlight and the red as a background where the sun shone through.

You can see the rough hatching out on the upper part, what is also visible is evidence of an earlier attempt, the hatching that is underneath the red ground, luckily this method means you can redo such things.
Why not go to greater lengths in terms of detail? yes it is eminently possible, but given that this orb could have been used by the retinue of the knight of the moon and by implication produced in some quantity and the fact that such things are not observed close up so extra detail is a waste of time. Convenient use of a very few tones to achieve depth of colour was very common so an eye for boldness is needed.

Thursday, 27 August 2009

Ecranche shield


As a gift for a client I have decorated an ecranche shield in theory for parading around, however there is the possibility that he may well try to use it, his call I guess.

Specification:

Plywood shield, client supplied
Linen canvas covering - client supplied
Gesso - whiting and gelatine size.
Silver leaf
Synthetic vermillion
Synthetic lead tin yellow

The client's emblem is a a crescent argent on a red (gules) background.

His motto "los en Croissant" I do not know what that means yet, but will find out soon I expect.

The crescent is raised gesso, ie layers of gesso applied in the rough shape then scraped back to the requisite profile. I will try another method where I lay on a thicker paste like gesso then sculpt it to see if there is any difference in strength, I will also use gesso grosso - plaster of paris with size, this gives a much stronger gesso, but has a short shelf life when wet as it sets, normal gesso (sottile in cenninni's world) can be kept wet using a bain marie.

I then laid bole upon the crescent, this is a red clay foundation often used under metal leaf, this allows for breaks in the leaf, faults, to be less visible, ie less contrast between the gold and the uncoloured ground, the red is more sympathetic with gold, but it does work with silver.

The area was burnished then I had to plan the layout for his motto.

As a burnished metal is quite smooth it needs a medium that will not run off the surface and Cenninni recommends using egg yolk as the binder, this not only lays on well, but is very tough when eventually chemically dry. I have tried gum arabic in the past but even if thick enough it will crack off, I have some egg laid in modelling on some gold from many years back and it is as tough as old boots.

After the text I added the figuring over the red, this was done a lot, I suspect it made a flat painted surface a bit more interesting closer up and at a distance did not interfere with the overall background colour.

First image is the silver and red background, the second is the figuring.


Friday, 14 August 2009

Silk


Above is a quick and dirty work on some red silk, the silk is dyed with brazil and weld, brazil givomg the red and the weld gives a good foundation for the red, even though it is yellow it is not orangey but slightly warmer than the cool red of brazil. Not a period mix as far as I know but an experiment from me.

For technical reasons I ended up making quite a few blodges on the work, also my three year old daughter decided to spray some plants as I was in the garden snapping my work, hence the blotchiness. The Lion/Leopard's club feet are down to me mixing the ground badly and it spread.

The idea is that this is a putative cloth badge, late medievalk, possibly worn by a town dignitary for special occasions or by an officer. Instructions on cloth gilding are well recorded, so the actual technique is no mystery, just in some cases best guesses for actual uses.

This will be stitched to a stiffer canvas backing to give it some body, then it will be stitched to a garment.

The metal is gold leaf, triple weight antique, the modelling is black paint with an egg yolk medium, egg is a good medium for painting on metal leaf, there is an addition of gum arabic.

I used a modern acrylic varnish to protect it as I have not yet managed to make a decent medieval clear varnish, due to time and safety constraints, my only varnish is the brownish sort, whilst ok for gold would not serve for silver unless I was faking gold.

Of writing and paper

Below is a selection of images of a wrap book for an American client.

He wanted a commonplace book, a book of sorts, it may contain prayers, notes, accounts, recipes, basically anything of use or potentially of use to the owner.

The soft binding seems common enough, certainly the binding in this case is strongly based on the Greenhaulgh account book, Greenhaulgh was a Bailiff to a local landowner in the middle of the 15th century and his account book survives. This style of book appears to have been used for sketch books also. It makes economic sense, you have a soft binding which can be done cheaply ad easily at home, you add in the sections as required and if you need it hard bound at some point then you can, if not then no cost incurred on the binding.

The Greenhaulgh book shows evidence of expansion inasmuch as there are two distinct sets of binding thread, one blue and one white, they also are at different heights on the spine, suggesting a possible update at a later time.

What the book below does not have what the Greenhaulgh book does is a late 14thc music sheet pasted into the wrapper to provide stiffness, that alone in the original is interesting as it still has the clear remains of the azurite or ultramarine lettering and vermillion/red lead rubrics.

I do not have permission to show the book so you will have to bear with me.

Back to the client's book.

The client had a clear idea of the contents:
A device drawn into the front page, his device being three sheaves of corn with a bend and a crescent - forgive me I do not know the heraldic form for that. I added the floral arrangement, this was based on a late 15th design with just such an escutcheon within it.


A list of ordinance, cannons.
Some metal point drawings of ordinance
A tract on fencing, early 15thc
Some useful recipes, including a corrosive liquid to clean wounds, very useful for a soldier I imagine.


The book itself is calf leather, approx 1mm, I dyed it with brazil wood.
Brazil is a dye yielding tree from the caesalpina family the name predates the country by some hundreds of years. It would appear that the discovery of similar colour yielding trees in Latin America in the early 16thc gave rise to the name of the country. The Caesalpina of the medieval world was C. sappanensis, and that of the New was C. Echinata. It would appear that most of the Brazil wood today does indeed come from Brazil. For the purposes of my work that is fine as the colour yield appears to be the same. If at such time I acquire C. Sappanensis I will conduct some trials for comparison.

The dye was prepared as per medieval recipes, the wood was shaved small and soaked in water, an amount of alum was added to the bath and boiled until the water was as red as it was going to be, allowed to settle and strained off.

In this case the leather was dyed both sides, some historic mentions say to only apply dye to the visible surface, in one particular case, the uppers of shoes, again a sensible economy, why dye the inside of something that will not be seen and most likely be corrupted by sweat?


Finally, as with all my medieval and Tudor paperwork I only use GriffenMill archive papers, these have been especially made to resemble early laid papers and they are a joy to use.
The ink is oak gall and the pens used goose quill, standard materials and tools for me.


Tuesday, 5 May 2009

A quick list

Of things that I have been lucky enough to try out and work on over the last few years, not in order of when or how big, but as I can recall them. Do I have pictures of all of them? of course not.

Paper and parchment: Letters and packages, woodcut prints - devotionals, medical drawings

Cloth: Borders - painted, fenestrals - cloth windows, wall hangings, table covers, helmet flags, banners, badges. Painted, printed and or gilded. Cloth includes: silk, linen/hemp and wool.

Wood: pavises - made from scratch and painted and gilded, boxes painted and gilded.

Food: subtleties, paste work, gilded, marchpaine

Areas I want to explore:

Verre Eglomise - gilding on glass then scratching out the design with painting on the back, the link shows a third party file for a 16thc example at the V and A. Earlier examples do exist, process is much the same.

Crests - for funerary achievements or for tournament, fascinating area calling for all the skills available, painting, sewing, carving, modelling etc.

Monday, 4 May 2009

Mini gallery

This might be redone due to me getting used to this medium.

For more images click on my gallery link on the right hand column>>>>>>>>

Zodiac man, late 15thc, early 16thc, from York Barber Surgeons

Letter and package, commission, parchment and conservation paper, oak gall ink, sealing wax

Commission, banner, vermillion, lamp black, antique linen, silver leaf


Commission, badge, antique linen, genuine azurite, gold leaf


Brasil and its wonders.

The batch of 'rose colour' is now drying in a ceramic dish as is the weld yellow. The rose colour is more like a purple pink.

With the excess brasil bath I dyed some silk, I added a little weld to boost the red a bit, let it steep in hot water for a while and overnight in the pot, the result is a vibrant red, it is now drying on the line.

As I don't like wasting anything, the silk will be used as a basis for gilded badges and devices.

Brasil dyed feathers:
There are medieval sources for dyeing feathers, I tried this last year, with the ubiquitous brasil and the reds were fine and visible but what was surprising was that the feathers whilst faded considerably in my she window have retained a fair amount of the colour. I will aim to reproduce this in the summer, conducting a control test by having some wrapped and hidden, the other half exposed to sunlight, pics will be posted.

Why dye feathers? 
Plumes for helmets and crests, presumably for other decorative use - possibly food subtleties
A fragment of text in the Cennini treatise mentions dyed quills for quilling, but nothing more than that tantalising snippet.

I will also try other colours, but not being a dyer will most likely rely on:
reds, yellow and black. I don't have the kit for woad etc.

I have just realised that the 16thc Booke of Secrets -  also mentions quill dyeing, interestingly only the three colours listed above, see here.

Sunday, 3 May 2009

Ok, so I wont be winning any blogger of the year awards, seeing as my last post was in late 2007. 


Above images show a textile sample with gilded device and a paper sketch, with gilding, both sent to client. I will try to get client's permission to post an image of the flag in situ.


I was in the shed today and mused about the blog and for some reason thought it was only a few months ago. I was wrong. 

A brief recap on the projects mentioned:

Helmet flag for UK client, went well, I still have reservations about the way he wanted the flag to fly, I don;t think it looked right in that context, in others it might have done.

The US client was over the moon with the purple silk with modelled gilded figures, (click here) I confess to having been rather proud of that project and saw it very much as a labour of love and gladly put my all into it. I wanted to manage the project from a soley modern design led method. Agree brief with the client, sent samples of the idea to the client to agree style and content, plus samples of the intended silk, have design approval, finish project. As it happens there was very little different in that approach to the medievals, ok they didn't have to sort out UPS and send what was a simple job in medieval terms half way across the globe. But the agreement of ideas and style with an acceptance of the artist's personal touch goes way back. As a trained graphic designer it is nice to know that some things have not changed. 

Other projects have included more written reproductions, a few pilgrim letters and some work for the Salt Museum, Northwich, Chester Writers Exhibition, where I was asked to produce and source a number of items that a literate (in the modern sense) late 14thc person might have. It appears that one iteration of Gawaine and the Green Knight was written in the Chester region, hence the request. The items included: pens, wax, paper, written items - namely a page from GatGK and two pen knives, one blunt for visitor handling and the other sharp for use. Both made by the late and very talented John Buttifint, who died last summer (2008) after a long battle with cancer. A finer man you could not want to have dealings with, a superb cutler and someone who relished a real challenge. It was an honour to attend his funeral, in my view a good way of saying goodbye, swapping stories and also renewing old acquaintances. 

I am one of the many lucky people who own some of John's work, knives that are meant to cut, I cut pens and prepare my food with his items and by so doing I remember a decent man and a fantastic craftsman.

Back to weld. I have to send the rest of an order to a client, namely some weld reacted with chalk, to make a yellow colour. Fine, I boiled up some weld and alum and decanted the liquor, I then had the brain wave of making another batch with the leavings, to eke out the colour, I do think like a medieval chap sometimes, save, save, save. So I promptly provided some fresh pee and boiled it up. I left the mixture to steep on a low heat and went to chat to the next door neighbour about his back.  A while later the wife pops her head out and says the mixture is boiling over. I return to the kitchen and the wife complains that the house smells of urine.....oops. She was lucky it was fresh pee, the aged variety as is oft specified is a much headier brew. The yellow was good, although not for the client, for my own 'personal use'.

I have also dyed my new Sally Pointer statute cap, not being a dyer but being a nosey git I tried the old oak gall dye and to be honest was happily surprised with the result, I had to double dye it and the end product is a deepish blue grey, the first dyeing was more a purplish blue grey. There are some areas where the wool has gone very black, mainly because I did not have a pan big enough and I see areas of better steepage. The hat will get well used over the next few years, it will be interesting to see how the dye reacts to sweat and light etc and if the wool degrades appreciably. 

The best thing is I now have enough ink to last me about 8 lifetimes, anyone want some?

Sunday, 30 September 2007

Ok, so it has been a long time

Not being too blog friendly and having a life, although some would dispute that, I have not got round to posting more, however here goes some more juice from the fruit that is medieval painting.

This summer saw me collect some weld, to keep my stocks up, although I actually used it for dyeing cloth, not to be a latter day wannabe traditional dyer but more to get some quick coloured cloth to paint over as I am enjoying the odd bout of textile printing and painting.

This year has seen me be given a few little commissions involving either the print side of textile decoration or painting of same:

The first was to produce a woodblock for a repeat textile pattern, circa 1580s, a stylised poppy, based on client sketches from an original. The detail or lack thereof meant a little tweaking and guesswork, but the end result was convincing and my own samplers looked the part. I had stained the green areas with either green earth or malachite, the red was synthetic vermillion, the yellow - saffron. The malachite is a very vibrant light green and I can see how well it would work with yellows to produce nice, rich leafy greens. It being a version of azurite is still liable to lose its colour depth through over grinding and some care has to be taken when preparing it, not to mention accepting that larger partciles although are brighter are a challenge to lay down.

It is certainly right that size and egg are the requisite media, having used both malachite and azurite on cloth I can see why, the azurite particles are so large that you need a strong bulky medium to carry the particles, even then it is a case of laying the colours down quite heavily, there is also a lot of streaking, needing more overlaying. But azurite does yield a stunning blue. Mine was apparentyl of African origin, which had quite a bit of kaolin included in it, which meant a lot of washing, but worht it. I will ask for German or European next time to see the difference, if any.

I was asked to paint a small silk helmet flag in Grisaille, the head of John the Baptist, detached from body and on a plate, I based it on an English alabaster carving of the 15thc. Working with silk was an experience, I used very fine, almost tissue -like silk, great for fluttering flags but delicate to work with, even my soft hands had enough rough parts to snag the weave.

Another helmet flag was commissioned, this time on linen, with much azurite, a gilded wooden ball, with raised gesso work accompanied the piece, I admit to enjoying the preparation of the bal more than the painting of the flag, mainly due to my reservations on the client's idea on how the flag should fly.

In theory I am also in the frame for a horse based project, although no more on that as yet.

Finally I am in the process of putting together another helmet flag for a client in America, said client is very much into 15thc Burgundian military and has commissioned an 18" silk (violet) helmet flag (a run on these this year methinks), all devices to be gilded and hatch modelled. The trial pieces look lush and the client is very excited. I wont post pics yet as I prefer to leave that to the end.

During all that, the usual experiments with colour, have had a nice play with cochineal, very interesting. - more at another time.

Friday, 23 February 2007

A while since I was here

First published 9/07/2006

A while since I was here, mainly getting on with things, life being more than my meanderings with pigments.

The lakes have gone well, in that I am pretty convinced I have the handle on brazil and weld. Weld does indeed give a bright yellow pigment, no surprise really since it yields a yellow dye.

A few weeks back I picked up a rather small, dried yellow stalk of weld from a Little Chef or some other non-descript road side 'food' place and absently put it into my back pocket. An hour's drive later to Hampshire to visit some friends, we were en route back from Ilminster and wanted to break our journey in Headley, I was asked by wife and wife's friend why I had strange yellwo streaks on the back of my new trendy shirt. The little stalk of weld had, with the sweat of my back, leeched out a very fine and deep yellow, much to my wife's chagrin, as it was she that had gifted me the shirt in the first place. But instead of being contrite I was jubilant because I had noticed that the yellow was a much deeper sort than I had previously managed to get from green weld. Anyway as the yellow wasn't mordanted to the shirt it was washed out easily enough. A subsequent conversation with a traditional dyer revealed that she had too suspected a yield difference, yet because the dry old past-seed weld looks washed out there was an assumption of less colour. The two of us had that odd look of revelation about us as we imagined the increased value of the yields for dyeing and pigment making, respectively.

My soon to be four year old daughter is now a weld afficionado, a veteran of a good half dozen weld gathering missions in various parts of Suffolk and Hampshire, she can spot a clump of weld as well as I can.

I am worrying that the late summer months become a bit of a haze of me keeping a watch out for clumps of the stuff, sadly much of this fantastic plant grows along the hard shoulder or other equally inconvenient places that I can't stop at. Imagine my sheer frustration when being caught in an hour long traffic jam outside Newmarket and seeing the largest clumps of Weld to my left, I was in the inside lane, so could have stepped out in a mad frenzy of weld gathering, but refrained, but next time.

for those who want to see this plant but not want to be travelling at 70 mph to do so can check out weld here.

www.british-wild-flowers.co.uk/W-Flowers/Weld.htm

A good wash

first posted 2/24/06

Good washing of the lakes is important lest residues of alum or the lye remain, this shows up as a bloom when drying in the dish, you knwo when the lake is clean when no bloom rises when left standing for a few days.

I attempted to liberate the brazil red colour in oil, some plants liberate colour in oil, brazil did not, at least not in cold oil, I suspect it wont in hot either. The idea was based around the principle of creating an oil glaze straight off rather than making a lake then drying it then grinding it with oil. I guess the insolubility of the brazil is why I can find not one mention of such a process but dozens about using lye and alum etc for creating the lake in the first instance.

Also I found out that hard water has an adverse effect on brazil, I normally used boiled water but lately forgot and it meant that much of the calcium (carbonates/sulphates?) in the water reacted with the alum and pigment creating a useless sediment on the bottom of the test jar. It also seemed to reduce the yield. I realise that the red is increased by adding alum but this was a noticable drop in yield, so all water must be low in mineral content. I understand that dyers have to take into account the hardness of water in their regions.

Madder lakes coming soon, had a quick go the other week, results were that the colour is a brownish red going to garnet depending on pH, made a nice peachy pink chalk precipitate with it though, but am looking for the reds mainly.

lyes lyes and truths

first posted 2/22/06

I had success with the lye after reducing the concentration, nice transparent lakes so far. Adequate preparation of the lake is needed prior to use.

Colour tests underway with opaque variants too, showing some promise.

Caution: lye is very corrosive in high concentrations.

The lye is also useful for cleaning oil based paint spills on the slab as it effectively combines with the oil to make a self-cleaning detergent. Not that easy to clean brushes though as the hair is vulnerable to decomposition.

Highly concentrated lye will rot animal hair, some wool left in a small tub of lye was reduced to a jelly like substance.

Fun with lakes

recovered from my corrupted 'Experiments with colour'


For the last few months I have been experimenting with producing a variety of lakes from brazil wood using known recipes going as far back as the 14th century.

Mostly the results have been quite predictable, in that an alum based with wood has yielded a cherry red lake. Chalk precipitates of this have given a range of opaque colours going from pale cool pink to almost purple, this is dependent on the acidity of the lake and the amount of chalk ground in.

The best thing about scraping chalk into the lake is that it decomposes, ie does not retain much of its structure as it combines with the alum and the brazil colouring. Upon drying it is easy to grind any of the few granules that are left.

On top of this I have been trialing making transparent precipitates using caustic soda solution as a substitute for wood ash lye, mainly for my own convenience. Initial results were poor as I had made a far too alkaline solution and it resulted in a colour that corroded the paper substrates.

The solution strengths are under review.

Also coming up will be weld and madder lakes, again close attention to the alkali levels in the soda/lye water. Medieval methods of testing optimum concentration were to see if an egg floated in it and did not corrode the shell. This method seems fair enough.